Plumbing Tools and Techniques

Plumbing is an essential aspect of any home or building, providing clean water for drinking, bathing, cooking, and maintaining hygiene. Whether you’re a professional plumber or a DIY enthusiast, having the right plumbing tools and understanding the various techniques is crucial for performing repairs and installations effectively. In this blog post, we will dive into the must-have plumbing tools, their functions, and essential techniques every plumber should know.
Essential Plumbing Tools
A good plumber needs the right tools to get the job done efficiently. Whether you’re tackling a clogged drain or replacing a water heater, the following tools are indispensable for any plumbing project.
1. Pipe Wrench
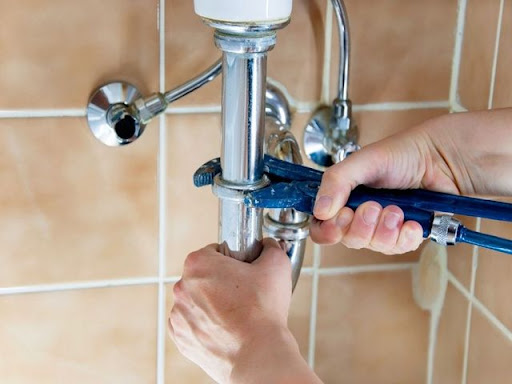
A pipe wrench is a plumber’s go-to tool for gripping and turning pipes. Its adjustable jaws can clamp onto pipes of varying sizes, making it a versatile tool for tightening or loosening threaded pipes. There are two common types of pipe wrenches: the straight pipe wrench and the offset pipe wrench. The offset wrench provides additional leverage, making it ideal for tight spaces.
2. Adjustable Wrench
An adjustable wrench, often referred to as a crescent wrench, is designed with a movable jaw that allows it to fit various sizes of nuts and bolts. It’s a flexible tool for plumbing tasks like tightening faucet fittings, removing drain covers, or loosening compression fittings.
3. Plunger
A plunger is a simple yet powerful tool for clearing blockages in toilets, sinks, or bathtubs. It works by creating suction and pressure to dislodge clogs. A good-quality plunger with a flange is particularly effective for toilet clogs, while a standard cup plunger is suitable for sinks and bathtubs.
4. Pipe Cutter
When replacing or installing new pipes, a pipe cutter is a must-have tool. It ensures clean, straight cuts that will allow for proper connections and fittings. Pipe cutters are available for various materials, including copper, PVC, and steel pipes, and are designed to be easy to use, providing smooth and accurate cuts.
5. Teflon Tape
Teflon tape, also known as plumber’s tape, is essential for sealing threaded pipe joints. It prevents leaks by filling in the gaps between threads, ensuring a watertight seal. It’s important to wrap the tape around the male threads in a clockwise direction before tightening the connection.
6. Basin Wrench
This unique tool is used for reaching and tightening nuts that are located in tight spaces, like under sinks. The basin wrench’s long, adjustable handle and pivoting jaws allow you to work in cramped areas with ease, making it essential for tasks like removing or replacing faucet nuts.
7. Hacksaw
A hacksaw is another vital tool for cutting through pipes, particularly when working with metal pipes like copper or steel. The serrated blade makes it easy to cut through tougher materials that other pipe cutters might struggle with. It’s an indispensable tool when you need to make quick cuts.
8. Plumber’s Snake (Auger)
A plumber’s snake is an essential tool for clearing stubborn clogs deep within the pipes. It consists of a long, flexible coil that can be fed into a drain to break up blockages or grab debris causing a clog. Electric models are available for more extensive jobs, providing more power for large-scale blockages.
9. Pipe Bender
A pipe bender is used for shaping pipes to fit into specific spaces or angles. It’s most commonly used for copper, aluminum, and other metal pipes. It helps create smooth, consistent bends without kinking, ensuring proper water flow and a professional-looking installation.
10. Plumbing Torch
When working with copper pipes, a plumbing torch is necessary for soldering joints together. The torch uses a flame to heat the pipe and solder, creating a secure and leak-free bond. It’s an essential tool for any plumber working with copper installations.

Common Plumbing Techniques
Understanding the right techniques to apply while using plumbing tools is just as important as having the right equipment. Here are some of the most common plumbing techniques every plumber or DIY enthusiast should master. Whether you are fixing a leaky pipe or installing a new system, always ensure you have the right skills or consult the best plumbing service to achieve optimal results.
1. Soldering Copper Pipes
Soldering copper pipes is a fundamental technique for plumbers. It involves using heat and solder to fuse two copper pipes together. To do this:
- Clean the ends of the pipes and the fittings using a wire brush or abrasive cloth.
- Apply flux to the joint, then heat the area with a torch until the solder melts and flows into the joint.
- Allow the joint to cool before testing for leaks.
Properly soldering pipes ensures a secure and leak-proof connection. This technique is widely used in water supply systems and heating installations.
2. Threaded Pipe Connections
Threaded pipe connections involve screwing together two pipes or fittings with threads that match. This method is commonly used for gas lines and some water systems. To ensure a watertight seal:
- Clean the threads and apply Teflon tape.
- Tighten the connection using a pipe wrench or adjustable wrench.
- Avoid overtightening, as this can damage the threads.
Threaded connections are relatively easy to install but must be handled with care to avoid leaks.
3. Fixing Leaky Faucets
A leaky faucet is a common household plumbing issue. Most leaks occur due to worn-out washers or seals. Here’s how to fix it:
- Turn off the water supply to the faucet.
- Use a wrench to remove the handle and the valve stem.
- Inspect the washer or O-ring for wear and replace them if necessary.
- Reassemble the faucet and test for leaks.
This is a relatively simple technique but requires attention to detail to ensure the faucet works properly.
4. Replacing a Toilet
To replace a toilet, you’ll need to remove the old unit and install a new one. Here’s a basic rundown of the steps:
- Turn off the water supply and drain the toilet by flushing it.
- Remove the bolts securing the toilet to the floor.
- Carefully lift the toilet off the flange.
- Install the wax ring on the new toilet’s base and position it over the flange.
- Secure the toilet in place, reconnect the water supply, and test it for leaks.
Replacing a toilet can be a challenging task for beginners, but with the right tools and proper technique, it’s manageable.
5. Installing a New Sink
Installing a sink requires some precision and proper alignment. Here’s how:
- Begin by measuring the space where the sink will be installed to ensure it fits properly.
- Position the sink onto the countertop and mark the mounting holes.
- Drill holes for the mounting hardware and faucet.
- Install the faucet and plumbing fittings before securing the sink in place.
- Attach the drain pipes and test the installation for leaks.
Installing a sink requires an understanding of the plumbing system and how to properly connect pipes.
Conclusion
Plumbing is a skilled trade that demands both the right tools and techniques to get the job done right. By equipping yourself with the proper tools and mastering the essential techniques, you can handle most plumbing jobs, whether you’re a professional plumber or someone tackling a DIY project. Always remember that safety should be your top priority, and if a project seems too complex, don’t hesitate to call a professional plumber to avoid costly mistakes.


 Branding for Digital Platforms
  Importance of User Research in UX Design
  Understanding Roofing Insurance Claims
  Technology into Your Condo Renovation
  Save Money on Car Rentals
  Alternatives to Tooth Extraction